Administration Manager.
 For an introduction to user permissions, see About User Access and Licensing. In this topic, you will learn how to configure most user permissions in TLC. To configure Manager, Database, and Audit Logger permissions, see the following topics:
Working with Manager Permissions
Working with Database Permissions
Working with Audit Logger Permissions
For all User Accounts and Groups, you can configure most user permissions in the Edit Permission dialog in the Administration Manager (see Figure 45).
To configure user permissions in the Administration Manager:
| 1. | In the side bar, select Resources >Administration Manager. |
| 2. | In the side bar of the Administration Manager, expand the  Permissions. Permissions. |
| 3. | Select a group (or sub-group) of permissions. TLC presents the group's permissions in the workspace table. For each permission: |
The Users column identifies the individual User Accounts that have the permission.
The Groups column identifies the User Groups that have the permission.
To add or remove the permission to/from users and groups, double-click the permission. The Edit Permission dialog opens (see Figure 45).
|
Tip |
To determine what a User Permission does, open the Edit Permission dialog and refer to the Description field. |
|---|
Figure 45. Example of an Edit Permission dialog
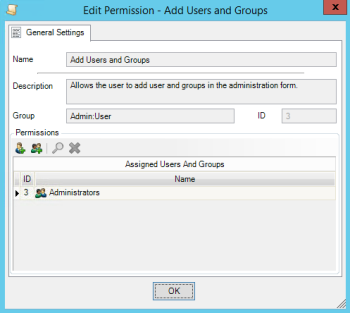
| 4. | To add a User Account, click Add User. Add User. |
To add a User Group, click Add Group.
| 5. | Once all desired accounts and groups have been added to the permission, click OK. |
You can also assign User Permissions in the properties dialog of a User Account or Group. In the Permissions tab, you can specify the User Permissions that apply to the account or group.
To open the properties of a User Account:
| 1. | In the side bar, select Resources >Administration Manager. |
| 2. | In the side bar of the Administration Manager, select  Users. Users. |
| 3. | In the workspace, double-click the User Account. |
To open the properties of a User Group:
| 1. | In the side bar, select Resources >Administration Manager. |
| 2. | In the side bar of the Administration Manager, select  User Groups. User Groups. |
| 3. | In the workspace, double-click the User Group. |
To add a permission to the User Account or Group:
| 1. | In the Permissions tab, click Change User Permissions. Change User Permissions. |
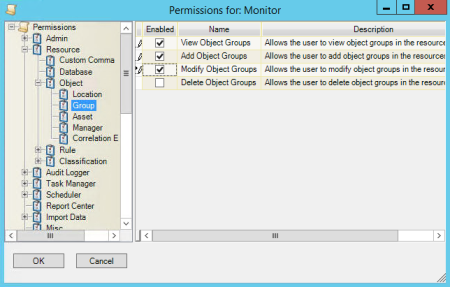
| 2. | In the side bar of the Permissions for User dialog (see Figure 46), expand the group containing the permission. |
| 3. | In the workspace, select the check box for the permission and click OK. |
Figure 46. Permissions for User dialog