Configuring a Microsoft SQL Server
Firmware: ALL
Collector: File Collector and Advanced File Collector
Step 1. Configure Microsoft SQL Server
To configure a Microsoft SQL Server to send log messages to TLC, complete the following steps in Microsoft SQL Server Management Studio:
| 1. | Connect to your SQL Server instance. |
| 2. | In the Object Explorer, right-click the SQL Server instance and select Properties. |
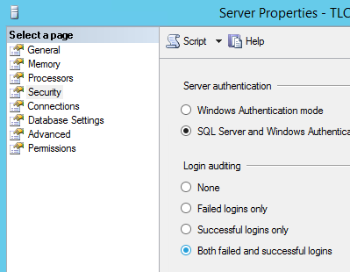
| 3. | In the left pane of the Server Properties dialog (see Figure 81), select Security. |
| 4. | In the left pane of the Server Properties dialog, select Both failed and successful logins and click OK. |
Figure 81. Server Properties dialog
Step 2. Configure your Windows Timestamps
To configure your Windows timestamps:
| 1. | Open the Windows Region and Language tool. |
| 2. | In the Format tab: |
| a. | From the Short time drop-down, select H:mm. |
| b. | From the Long time drop-down, select H:mm:ss. |
Step 3. Create a Custom View and Export Events
To create a Custom View:
| 1. | Open the Windows Event Viewer. |
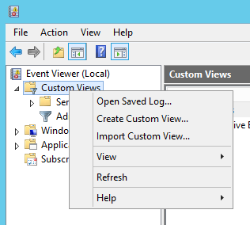
| 2. | Right-click Custom Views and select Create Custom View (see Figure 82). |
Figure 82. Create Custom View option in the Event Viewer
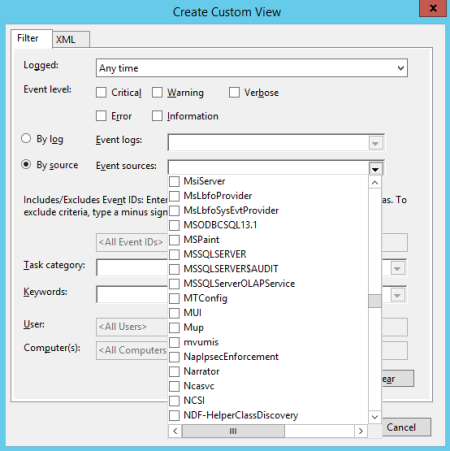
| 3. | In the Filter tab of the Event Viewer dialog (see Figure 83): |
| a. | Select all Event level options. |
| b. | Select By source, expand the Event sources drop-down, and select each option with an MSSQL prefix (e.g., MSSQL$SQLEXPRESS, MSSQLSERVER, etc.). |
Figure 83. Filter tab of the Event Viewer dialog
| 4. | Click OK and enter a name for the new Custom View. |
| 5. | Under Event Viewer in the Event Viewer window, right-click the Custom View and select Save Events in Custom View As. |
| 6. | In the Save As dialog, save the events as a CSV file and click OK. |
|
Tip |
You can also create this CSV file with the following PowerShell command: Get-EventLog -LogName Application -Source "MSOLAP`$SQLSERVER*", "MSSQL`$SQLSERVER*" | Export-Csv -Path C:\Users\Administrator\Desktop\SQLServerLogs.csv Where <path> is the full path to the directory in which you want to save the CSV file, and <filename> is the name of the file. |
|---|
Step 4. Create a Monitored Asset for the Microsoft SQL Server
To create a Monitored Asset for the Microsoft SQL Server, complete the following steps in the TLC Console:
| 1. | If needed, add and enable the appropriate Collector in the Installed Modules tab of your TLC Manager (i.e., either the File Collector or Advanced File Collector; see Table 42). |
| 2. | Create a Monitored Asset for the SQL Server. |
To assign the File Collector to the Monitored Asset, complete the steps in Configuring a Monitored Asset with a File Collector. In the Advanced tab of the Monitored Asset's properties dialog:
| a. | Select Get date from each line using the following REGEX and enter the following regular expression: |
(?<month>\d{1,2})/(?<day>\d{1,2})/(?<year>\d{4})\s(?<hour>\d{1,2}):(?<minute>\d{2}):(?<second>\d{2})
| b. | Select the Tail File for new entries. |
To assign the Advanced File Collector to the Asset, complete the steps in Working with Log Sources for an Advanced File Collector and create a Log Source for the CSV file created in Step 3. Create a Custom View and Export Events. In the Timestamp Format field of the Log Source properties dialog, enter the regular expression above.
| 3. | Push updates to the Manager (see Pushing Updates to your Managers). |
|
Tips |
For more information about regular expressions and tailing, click here. For continuous collection of log messages from the SQL Server, create a Scheduled Task in Windows to regenerate the CSV file with new data. |
|---|
|
Next |
If you are performing initial configuration of your TLC environment, see Configuring your TLC Environment. Otherwise, see Adding a Monitored Asset for a new Log Source. |
|---|