Prior to installing TLC Manager, complete the installation requirements (see Requirements for Tripwire Log Center Manager).
To install TLC Manager software on your Primary Manager host system, complete the following steps with a local administrator account:
| 1. | In the directory in which you unzipped the TLC installation package, double-click Tripwire Log Center Manager.exe. |
The TLC Manager Installation Wizard opens.
| 2. | Read the Welcome page and click Next. |
| 3. | In the License Agreement page: |
| a. | Read the License Agreement. |
| b. | Select I accept the terms in the license agreement and click Next. |
| 4. | Complete the Customer Information page and click Next. |
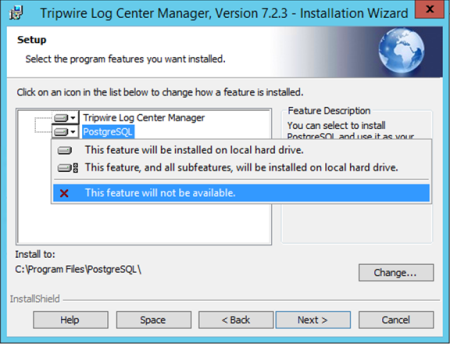
| 5. | In the Setup dialog, the installer presents a list of the "features" to be installed (i.e., Tripwire Log Center Manager and PostgreSQL). The installer only presents PostgreSQL as an option if PostgreSQL is not already installed on the host system. |
Review the settings in the Setup page and click Next.
If you do not want to install PostgreSQL, click the adjacent drop-down menu and select This feature will not be available (see Figure 5).
If you install PostgreSQL, Table 2 presents the default information employed by the installer. In the PostgreSQL Database dialog, enter and confirm a password for the postgres user account, and (optional) enter a port other than the default.
|
Note |
To configure PostgreSQL to permit remote connections, the installer will modify the pg_hba.conf and postgresql.conf files, as described in Step 3. Configuring PostgreSQL for Remote Access. |
|---|
To change the default installation directory for a "feature," select the feature and click Change...
|
Setting |
Default Value |
|---|---|
|
Localhost |
127.0.0.1 |
|
Port |
5432 |
|
Username |
postgres |
|
Security Protocols |
TLS 1.2 |
| 6. | In the Installation Directory page, select the directory in which you want to install TLC Manager. Then, click Next. |
| 7. | Click Install. |
| 8. | Following installation, a confirmation page opens. Click Finish. |
The TLC Manager Configuration Wizard opens.
|
Caution |
If the Manager host system does not have Internet access and you have received a license-key file from your Tripwire customer service representative, copy the license-key file to the directory selected in the Destination Folder page. |
|---|
To configure TLC Manager software on your Primary Manager:
| 1. | In the TLC Manager Configuration Wizard, select Click to Start. |
| 2. | Click New Install. |
| 3. | Complete the registration form and click Register. |
| 4. | Complete the Default Event Database page (see Table 3) and click Next. |
|
Tip |
To verify your settings, click Test Connectivity. If the connection fails, double-check the values entered in the Connectivity region (see Table 3) and verify that your Event-Management Database software is running. |
|---|
|
Region |
Fields |
|---|---|
|
Connectivity |
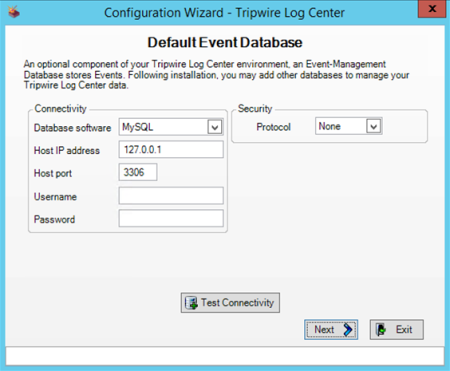
Database software. Your Event-Management Database software. If you select PostgreSQL, see Figure 6. If you select MS SQL, see Figure 7. If you select MySQL, see Figure 8. Host IP address. The IP address or host name of the system on which you installed your Event-Management Database software (i.e. your Database-software host). If the system uses an instance name other than the default, include the instance name (for example, 192.168.1.1\instance_name). Host port. The port with which the Event-Management Database system will communicate with the Primary Manager. Use Windows authentication. If you selected MS SQL from the Database software drop-down, you may select this option to enable Windows authentication for Microsoft SQL Server. Username and Password. The login credentials for the root user account for your Event-Management Database software. |
|
Security |
(Optional) To enable secure connections for communications between your Primary Manager and Event-Management Database software, complete the appropriate steps in the Security region. If you selected MS SQL from the Database software drop-down, select Encrypt Data with SSL. If you selected MySQL from the Database software drop-down, select SSH from the Protocol drop-down and complete the following fields: Username. The root user account for your Event-Management Database software. Password. The password for the root user account. Host. The IP address or host name of the system on which you installed your Event-Management Database software (i.e. your Database-software host). Port. The SSH port on your Database-software host by which your Primary Manager will communicate with the database software. |
Figure 6. The Default Event Database page for PostgreSQL
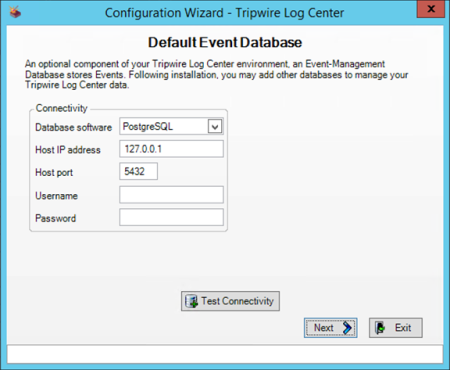
Figure 7. The Default Event Database page for MS SQL
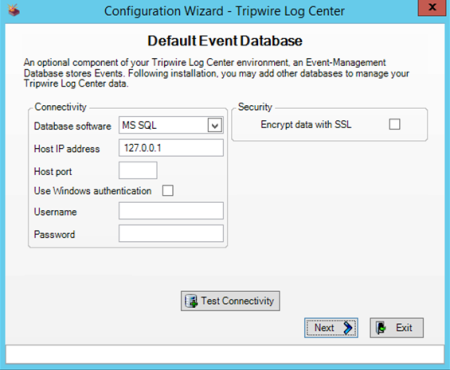
Figure 8. The Default Event Database page for MySQL
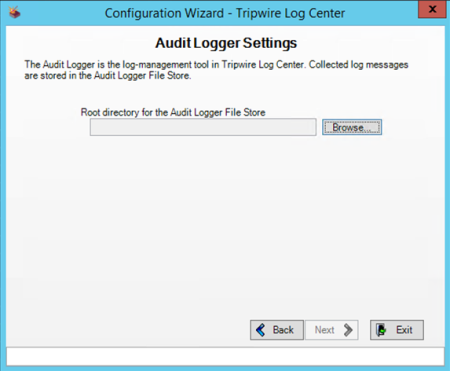
| 5. | In the Audit Logger Settings page (Figure 9), click Browse to select the directory in which the Audit Logger will store log messages from your Log Sources (i.e., the Audit Logger File Store), and then click Next. |
|
Tip |
For optimal performance, Tripwire recommends use of physical local storage (rather than NAS) for both the Audit Logger File Store directory. |
|---|
Figure 9. Audit Logger Settings page
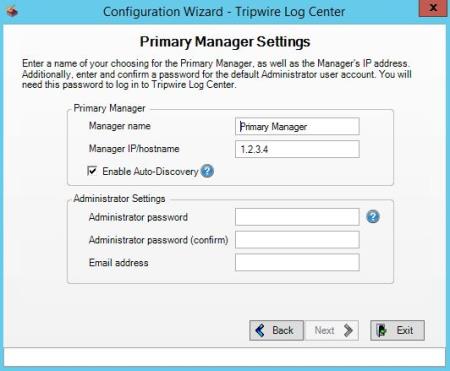
| 6. | Complete the Primary Manager Settings page (see Table 4 and Figure 10) and click Next. |
|
Field |
Description |
|---|---|
|
Manager name |
A name of your choosing for your Primary Manager. |
|
Manager IP/hostname |
The Primary Manager's IP address or host name. |
|
Enable Auto-Discovery |
If this setting is enabled and a Monitored Asset does not exist for a Log Source from which the Advanced Windows Collector, File Collector, or Network Collector receives a log message, TLC will automatically create a Monitored Asset for the Log Source. Tips: If you plan to employ Asset-Configuration Rules, Tripwire recommends that you disable this setting. For more information about Auto-Discovery and Asset-Configuration Rules, see How does Auto-Discovery work?. |
|
Administrator password |
Enter and confirm a password for your default TLC Administrator account. The password must contain: Eight (8) to 128 characters No spaces Uppercase and lowercase letters At least one numeric character (0-9) At least one of the following characters: Note: This is an internal security password and has no relation to a database and/or Windows security. |
|
Email address |
An Email Address for the Administrator account. TLC will send messages for the Administrator account to this address. |
Figure 10. Primary Manager Settings page
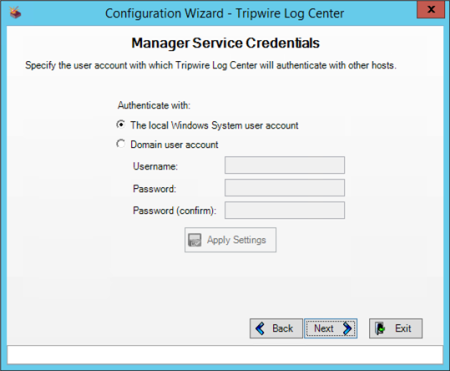
| 7. | In the Manager Service Credentials page (see Figure 11), specify the Windows user account that will run the TLC Manager Service. |
|
Caution |
Following installation, you may change this user account. For instructions, see the documentation for the TLC Manager’s Windows operating system. Tripwire recommends that you specify an Administrator account. However, if you want to assign a non-Administrator account, you must complete the steps described in Appendix II. Configuring a Windows User Account to Run the TLC Manager Service following installation. |
|---|
To use a local Windows user account, select The local Windows System user account and click Next.
To use a domain user account:
| a. | Select Domain user account. (If you installed Microsoft SQL Server in Windows Authentication mode as your Event-Management Database software, select the domain account created in Step 3. Creating a Microsoft SQL Server Login.) |
| b. | In the Username field, enter the domain and the name of the account (<domain>\<account>). |
| c. | Enter and confirm the account's Password. |
| d. | Click Apply Settings and Next. |
Figure 11. Manager Service Credentials page
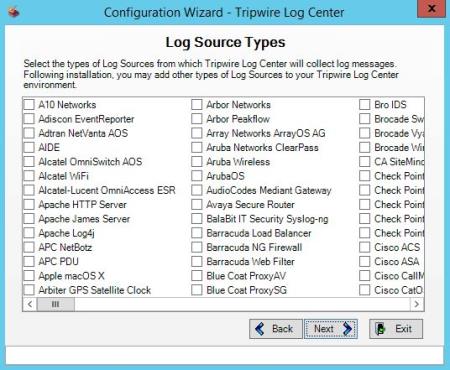
| 8. | In the Log Source Types page (see Figure 12), select the products to be monitored by TLC and click Next. |
|
Note |
TLC will auto-discover monitored systems in your TLC environment with the types of products selected in the Log Source Types page (Figure 12) if IPv4 is enabled on those systems. |
|---|
|
Tips |
If you plan to integrate TLC with Tripwire Enterprise, select both Generic and Tripwire. To enable the collection of log messages from Windows Event Logs by Axon Agents, select all of the Windows Log Source types. |
|---|
Figure 12. Log Source Types page
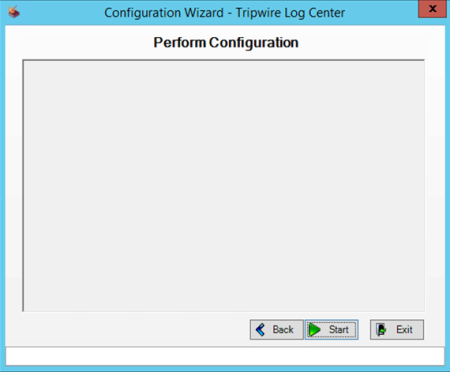
| 9. | In the Perform Configuration page (see Figure 13), click Start. TLC begins the installation process. |
Figure 13. Perform Configuration page
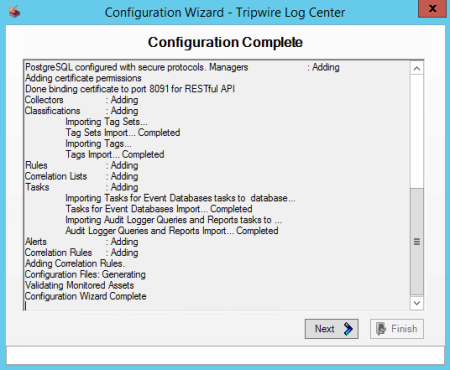
| 10. | Upon completion of the installation process (see Figure 14), click Next. |
Figure 14. Configuration Complete page
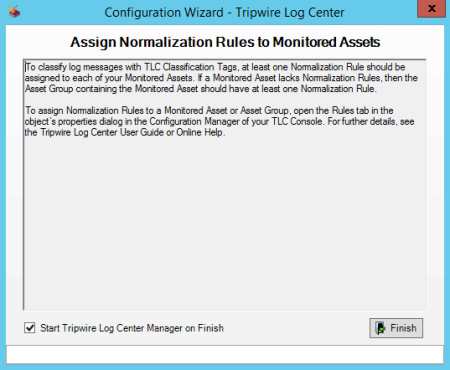
| 11. | In the Assign Normalization Rules to Monitored Assets page (see Figure 15): |
| a. | Read the text closely. |
| b. | Select Start Tripwire Log Center Manager on Finish and click Finish. |
Tripwire Log Center Manager opens.
Figure 15. Assign Normalization Rules to Monitored Assets page
| 12. | If you specified a non-Administrator account in the Manager Service Credentials page (see Figure 11), complete the steps in Appendix II. Configuring a Windows User Account to Run the TLC Manager Service. |
| 13. | To start the TLC Manager Service, click Start in the Tripwire Log Center Manager. |
TLC Manager populates the Log list with log messages.
|
Note |
If you plan to install Tripwire Axon Agent for TLC on a system(s) from which this Manager will collect log messages, you must also configure the Manager's Axon Access Point. For more information, see Getting Started with Tripwire Axon Agent for TLC. |
|---|